Attaching a Patio Cover to Low Eaves: Fascia Mount vs. Roof Risers
Learn how to choose between fascia mounts and roof riser brackets when installing a patio cover on low-eave Western Washington homes to preserve headroom, drainage, and structural integrity.
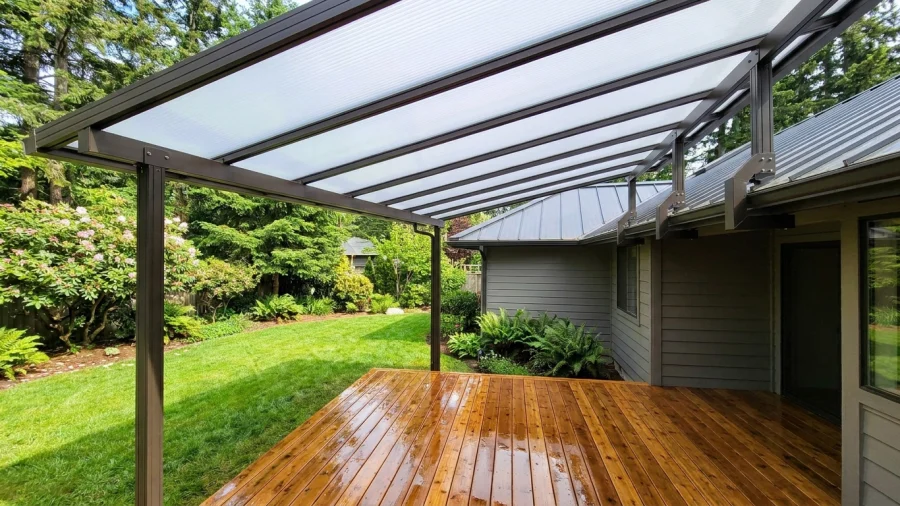
Many homes across Western Washington—from mid-century ranches in Seattle and Bellevue to 1970s split-levels in Kent, Puyallup, and Lynnwood—feature low eave lines. While these single-story rooflines provide classic curb appeal, they present a distinct architectural challenge when homeowners decide to add a permanent patio cover.
Adding an outdoor cover requires balancing two opposing needs: sufficient vertical headroom for walking, lighting, and natural daylight, and a steep enough slope to shed Western Washington rain and winter snow loads reliably. Understanding how your cover connects to the house is the first step toward an installation that protects both your outdoor comfort and your roof deck.
The Low-Eave Challenge on Western Washington Homes
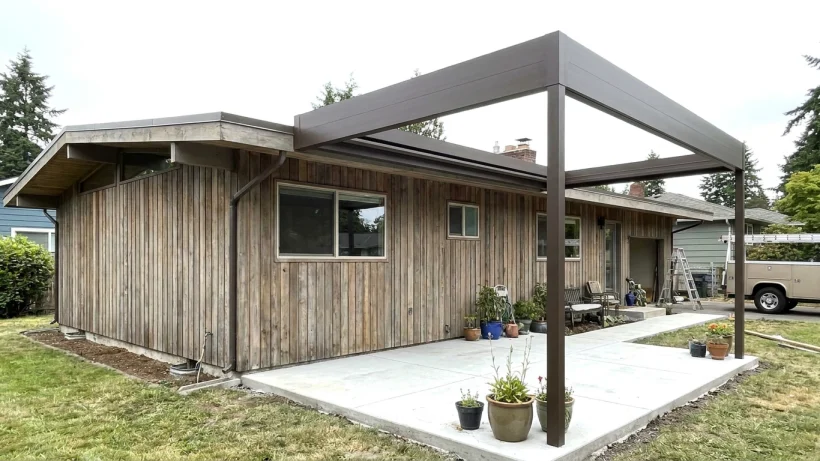
A standard single-story rambler in the Puget Sound area typically has an exterior eave or gutter line that sits between 7.5 and 8 feet above the patio slab. When designing an attached patio cover, that vertical dimension must accommodate multiple components: the mounting ledger or bracket, the depth of the roof rafters or aluminum frame, and the necessary downward slope toward the outer beam.
In our maritime climate, water management dictates structural slope. Solid panel covers, Acrylite daylight systems, and insulated patio panels generally need a minimum slope—typically at least one-quarter to one-half inch per foot—to prevent ponding, debris accumulation, and moss formation. Over a typical 12-to-16-foot patio projection, that slope consumes 4 to 8 inches of height.
When an attachment starts at a low 8-foot eave, the outer support beam can easily drop below 7 feet. This creates several immediate problems:
- Head clearance issues near the patio perimeter, especially for taller family members or outdoor ceiling fans.
- Obstruction of sightlines into the backyard from interior living rooms and kitchens.
- A cave-like, shadowed feeling directly over patio sliding doors, significantly reducing natural daylight entering the home.
Option 1: Fascia-Mounted Patio Covers Explained
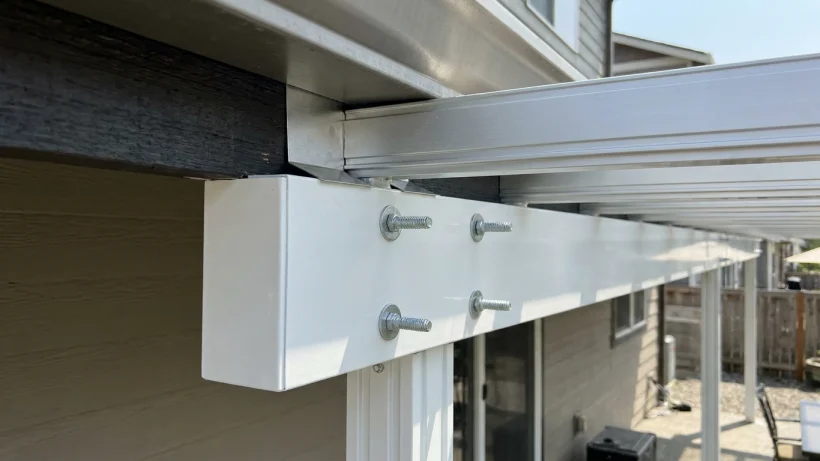
A fascia-mounted installation attaches the patio cover's house ledger directly to the horizontal fascia board along the roofline, just beneath or behind the home's gutter system. It is one of the most common methods used on modern two-story homes or single-story homes with elevated ceilings.
However, securing a patio cover to a fascia board is not as simple as driving screws into the trim. Standard 1x cedar or primed composite fascia trim is cosmetic; it is not engineered to bear structural loads, wind uplift, or snow weight. A proper fascia mount requires structural blocking behind the trim, securely tying the ledger back into the home's primary rafter tails with heavy-duty structural screws or through-bolts.
On low-eave homes under 8 feet, the fascia mount forces a difficult compromise. Homeowners must either accept a nearly flat pitch—which risks standing water, pine needle buildup, and premature seal failure—or drop the outer beam so low that the space feels cramped and dark.
Option 2: Roof Riser Brackets (Fly-Over / Roof Mount)
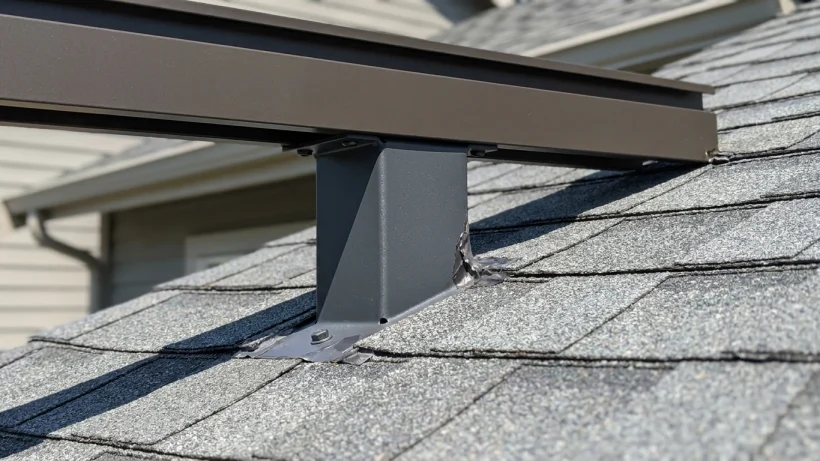
To solve the low-clearance problem, many Pacific Northwest builders utilize roof riser brackets (frequently referred to as fly-over roof mounts). Rather than hanging the patio cover below the gutter line, this system uses engineered steel posts that extend upward through the lower edge of the existing house roof.
These heavy-gauge powder-coated or galvanized steel brackets anchor directly into the exterior load-bearing wall's double top plate or securely sistered rafters inside the attic. The brackets emerge through the roof deck, lifting the patio cover's main support beam 12 to 24 inches above the house shingles.
- Elevated Headroom: By starting the patio cover roof higher than the house gutters, you can maintain an open, 8-to-9-foot ceiling height throughout the patio area.
- Unrestricted Natural Light: Raising the cover prevents it from sitting directly on top of your patio doors or windows, allowing ambient daylight to fill the home's interior.
- Aggressive Drainage Pitch: With extra vertical height at the connection point, the cover can feature a steeper pitch, clearing heavy rain and winter slush quickly into dedicated gutters.
- Better Backyard Sightlines: An elevated ceiling creates an open, architectural feel that blends the indoor space seamlessly with the garden.
Managing Pacific Northwest Weather: Water, Flashing, and Ventilation
With Western Washington receiving steady precipitation for months at a time, water intrusion details are the most critical factor when comparing these two installation styles.
A fascia mount sits directly in the gutter zone. If the existing gutter system overflows during an atmospheric river or gets clogged with autumn leaves from nearby Douglas firs or bigleaf maples, water can back up directly against the patio ledger connection. Flashing behind the gutter and over the ledger must be meticulously tucked under the house roof drip edge to prevent moisture from seeping into the rafter tails.
Roof riser brackets introduce roof penetrations, which naturally makes some homeowners cautious. However, engineered riser systems use specialized flashing boots—similar to plumbing vent flashing—that interleave directly with the composite roof shingles. High-grade elastomeric sealants and integrated storm collars direct water around the riser posts.
A notable weather benefit of the roof riser system is airflow. Because the patio cover floats above the primary roof rather than butting against the fascia, a gap remains between the two structures. This continuous air passage allows warm air and moisture to vent, significantly reducing damp shade pockets that encourage moss and mildew growth on the roof deck.
Direct Comparison: Fascia Mount vs. Roof Risers
When deciding which structural approach best matches your home and budget, consider these primary trade-offs:
- Usable Headroom: Fascia mounts on an 8-foot eave result in low perimeters (often under 7 feet). Roof risers routinely achieve 8 to 9.5 feet of clear height, delivering an airy, spacious outdoor room.
- Structural Complexity: Fascia mounts require localized rafter tail tie-ins and gutter adjustments. Roof risers involve opening shingle rows, securing brackets into exterior wall plates, and installing commercial-grade roof flashing.
- Cost Considerations: Fascia mounts generally require less specialized hardware and fewer installation hours. Roof risers carry a higher upfront investment due to heavy-duty engineered steel brackets and precise roofing labor.
- Gutter Maintenance: Fascia mounts can make cleaning the rear house gutter difficult since the patio cover frame sits adjacent to it. Roof risers leave the house gutter fully accessible underneath the fly-over structure.
- Architectural Aesthetic: Fascia mounts give a continuous, tucked-in appearance. Roof risers offer a modern, elevated pavilion look that can make smaller homes feel significantly larger.
Key Structural Checks Before Making Your Decision
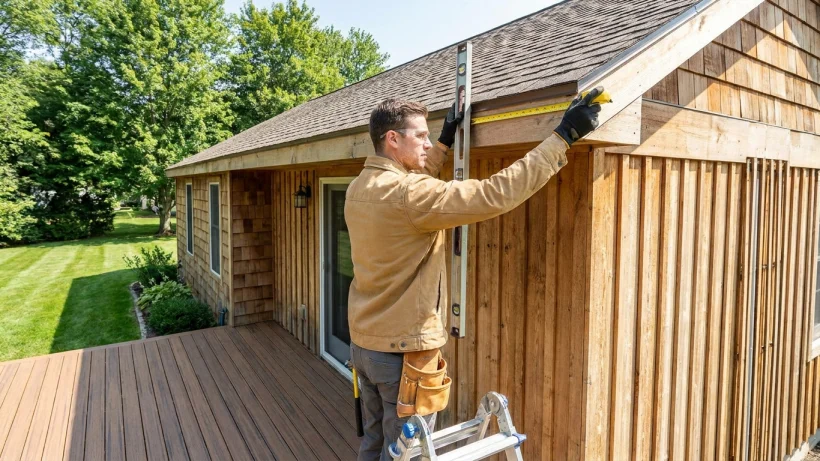
Before choosing an attachment method, several site-specific factors need a thorough professional evaluation.
First, inspect the physical condition of your existing eaves and rafter tails. Many older homes in King, Pierce, and Snohomish counties suffer from hidden rot along the fascia caused by failing gutter seals. If the wood rafter tails are softened or compromised, they cannot support a fascia-mounted ledger without costly structural repair work first.
Second, assess the age and condition of your roofing materials. Because roof riser brackets integrate through the shingles, they are easiest to install on roofs that are in good condition with plenty of useful life remaining. If your roof is approaching the end of its life, planning your patio cover alongside a reroofing project is ideal, as it allows seamless flashing integration.
Finally, ensure any chosen method accounts for local municipal building codes. In Western Washington, patio covers must be engineered to withstand specific ground snow loads—which vary from 25 pounds per square foot near the sound to 40 pounds or more in foothill communities—as well as wind uplift ratings. Proper engineering ensures that whether your cover attaches to the fascia or rises through the roof deck, it remains secure, dry, and stable in every season.