Ice Dams in Puget Sound: Roof, Drainage, and Insulation Fixes
Ice dams are uncommon in many Puget Sound winters, but a cold snap can expose problems with attic heat loss, roof details, and drainage. Learn what to watch for and how to plan improvements based on your home.
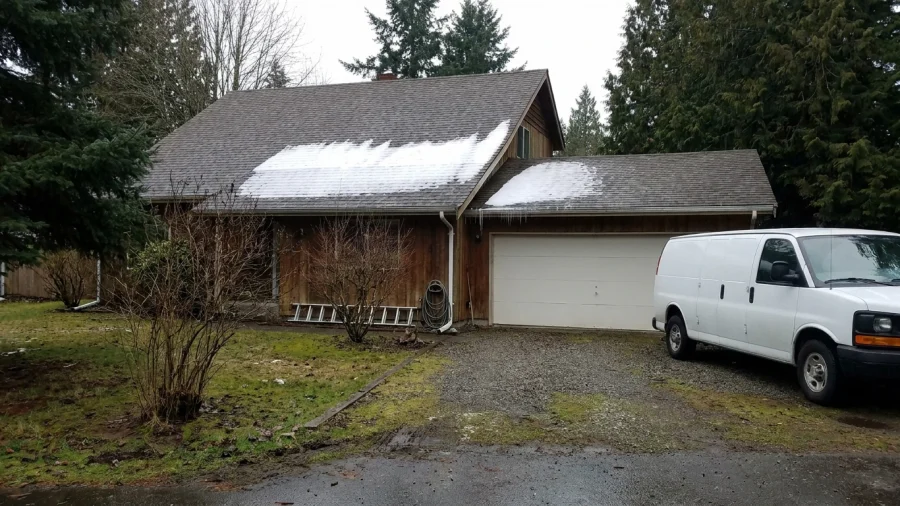
Ice dams in Puget Sound are a cold-weather concern, even though snow rarely stays on roofs for long. The most useful approach is to look beyond ice at the gutter: roof temperatures, attic conditions, and water-management details all affect what happens during a freeze-thaw cycle.
Why ice dams can happen in Puget Sound
An ice dam can form when snow melts over a warmer part of the roof, runs toward a colder eave, and refreezes into a ridge. Water may then collect behind that ridge instead of draining off the roof. Occasional snow, a daytime thaw, and freezing nights can create this pattern here; it is not a feature of every Puget Sound winter.
Roof shape, shade, exposure, attic conditions, and indoor heat loss can make neighboring homes behave differently in the same weather. Persistent rain or an ordinarily wet gutter, on its own, does not indicate an ice dam.
Recognize warning signs without climbing onto the roof
From the ground, look for a ridge of ice along an eave, a line of icicles, or ice and water collecting near a roof edge. Inside, damp spots on ceilings or walls near exterior edges, peeling paint, or staining that appears during or after a freeze-thaw event may be related. These are clues, not a diagnosis: roof leaks, flashing defects, condensation, and clogged drainage can cause similar symptoms.
Do not walk on an icy roof or chip ice with tools. Falling ice, slippery surfaces, and damaged roofing are serious hazards. Avoid heat sources or chemical treatments without professional guidance. If water is actively entering, move or cover belongings where it is safe to do so, photograph the affected area, and arrange an appropriate inspection or repair.
Find the conditions that feed ice buildup
Warm indoor air can reach an attic through gaps around ceiling fixtures, access hatches, and plumbing or wiring penetrations, as well as poorly sealed ductwork. Insulation slows heat transfer, but it does not stop air leakage; escaping air can also carry indoor moisture into the attic.
Uneven insulation, storage that compresses insulation, or blocked soffit airflow paths can interfere with the roof assembly’s intended thermal and ventilation strategy. Valleys, dormers, skylights, and other transitions may collect snow or complicate drainage without necessarily being defective. An attic and roof assessment together is more informative than assuming one visible symptom reveals the cause.
Improve attic air sealing, insulation, and ventilation as a system
Where appropriate, seal ceiling-plane air leaks before adding insulation. Work around heat-producing fixtures, chimneys, and similar areas must maintain the required clearances for the materials and assembly. Adequate, evenly distributed insulation can help limit heat reaching the roof deck, but the right scope depends on what is already in place.
For a vented attic, intake and exhaust paths should remain clear and work together. Adding ventilation is not a substitute for air sealing. Other attic configurations, including unvented roof assemblies, call for a different assessment. Damp insulation, mold-like growth, or signs of past leakage should be investigated before new materials cover them.
Check roof edges, flashing, and drainage details
Clear gutters and downspouts help move water away during ordinary wet weather, but they cannot prevent roof heat loss from melting snow and refreezing water at an eave. Routine gutter maintenance is worthwhile; wait for safe conditions rather than using a ladder during ice or a storm.
A roof inspection should consider the covering, eaves, valleys, flashing, roof-to-wall transitions, and penetrations for wear or gaps that could admit backed-up water. An ice-barrier membrane at the eaves may add protection when specified and installed appropriately, but it does not stop ice from forming. If roof replacement is being planned, the scope should address the existing assembly, edge protection, flashing, and ventilation—not just the visible shingles or other covering.
Choose fixes based on the home, not a one-size-fits-all remedy
Handle active water entry first, then investigate attic heat flow, roof condition, and drainage once the immediate situation is controlled. Adding insulation, replacing gutters, or installing heat cables alone may leave other contributing conditions untouched. Heat cables can be considered for particular layouts, but their suitability, installation, and operation need careful review; they do not replace appropriate air sealing or insulation work.
A useful written scope identifies observed conditions, proposed work, exclusions, and anything that needs further inspection. Ask how each measure addresses the suspected cause. Weather, roof design, and building conditions vary, so improvements can reduce contributing risks without guaranteeing that ice will never form.
What to document before arranging an assessment
- Note when symptoms appeared and whether they followed snowfall, a thaw, freezing nights, or heavy rain.
- Photograph the roof from a safe ground-level location and record interior staining without disturbing wet or damaged materials.
- Gather the roof age if known, prior repair details, attic insulation or ventilation work, and recurring gutter or drainage concerns.
- Ask whether the assessment includes relevant attic access, roof-edge and flashing observations, and identification of anything a ground-level review cannot confirm.
- Request recommendations that separate urgent water-management needs from optional improvements and explain how each item relates to the suspected cause.