How Ground Clearance Prevents Bottom Siding Rot in Washington
Learn why proper ground clearance is essential to prevent bottom siding rot on Western Washington homes, including clearance standards, moisture mechanics, and physical fixes.
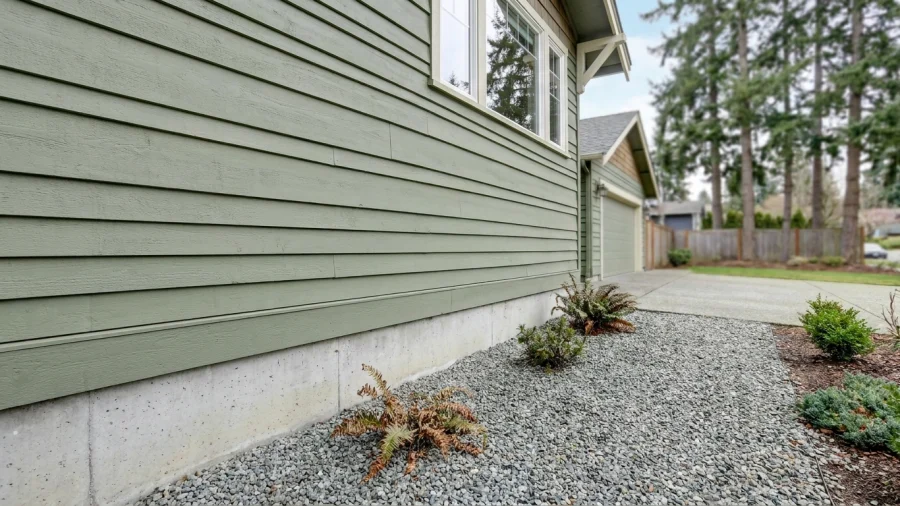
In Western Washington, exterior walls face months of continuous rain, high ambient humidity, and limited winter sun. While siding is engineered to shed water falling from above, the bottom edge of an exterior wall faces a very different challenge: relentless moisture rising from the ground. When siding boards are placed too close to soil, mulch, or hard surfaces, decay develops quickly.
Maintaining a deliberate physical gap between the bottom of your siding and the surrounding landscape is one of the most effective ways to protect your wall framing, sheathing, and foundation sill plate from long-term moisture damage.
Why Siding Rot Starts at the Bottom in the Pacific Northwest
Foundation perimeters in the Puget Sound region often exist in a persistent damp microclimate. Dense tree canopies, low-angle winter sunlight, and frequent light precipitation keep perimeter soils and foundation stem walls wet for days or weeks at a time.
While upper wall sections benefit from wind exposure and daylight that accelerate drying between rain events, the bottom edge of the wall stays damp. Several local factors concentrate moisture at this low point:
- Persistent ground-level humidity created by damp lawn turf, moss, and shaded foundation beds.
- Annual applications of bark mulch or topsoil that accumulate against the foundation wall, gradually burying bottom courses.
- Low air movement along perimeter planting beds, which prevents the lower wall from drying out after rainfall.
Because moisture exposure is continuous near the ground, bottom siding boards absorb water far faster than they can evaporate it. Over time, that constant moisture load breaks down paint films, degrades wood fibers or composite binders, and leads to structural rot.
The Mechanics of Splashback and Capillary Wicking
Bottom siding decay is driven primarily by two physical processes: splashback impact and capillary action. Understanding how these mechanics operate helps explain why ground clearance standards are strictly enforced by building codes and manufacturers.
Splashback occurs when heavy rain falls from the sky or drips from roof eaves and strikes the ground. That impact propels water, soil particles, and fungal spores upward. Water droplets regularly bounce 6 to 12 inches above the ground plane, repeatedly soaking the lower courses of siding with abrasive, microbe-laden runoff.
Once water reaches the bottom edge of the siding, capillary wicking takes over. Building materials—including natural cedar, engineered composite, and the factory-cut edges of fiber cement—act like sponges through microscopic pores and cellular structures. Water draws upward against gravity into the core of the board.
- Capillary draw pulls moisture several inches up into the board, well beyond the surface level of the initial splash.
- Unsealed bottom cuts and butt joints absorb water significantly faster than painted face boards.
- Nicks from string trimmers and weed-whackers damage protective coatings, creating direct entry points for capillary uptake.
Standard Clearance Guidelines: Soil, Mulch, and Hard Surfaces
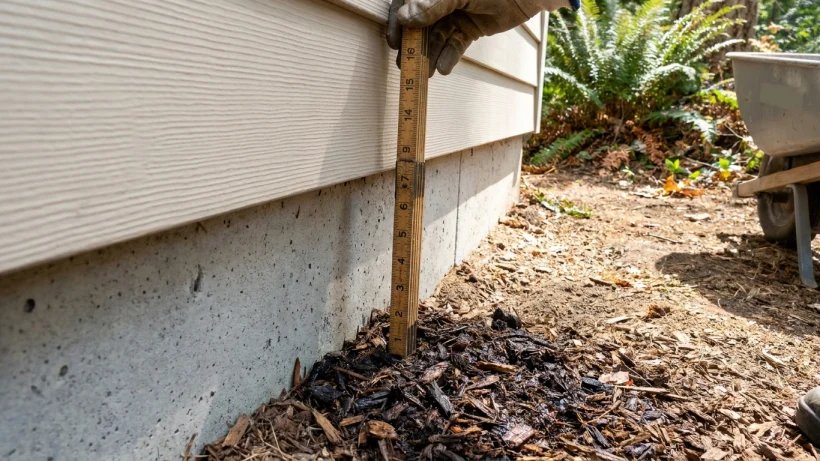
Building codes and siding manufacturers establish explicit clearance requirements to keep siding outside the splashback and high-humidity zone. These measurements apply to the vertical distance between the finished grade and the bottom edge of the cladding.
The standard minimum clearances used across residential construction include:
- 6 inches minimum above raw soil, lawn, bark mulch, and decorative landscape beds.
- 2 inches minimum above paved hard surfaces, including concrete sidewalks, asphalt driveways, patio pavers, and deck walking surfaces.
- 1 to 2 inches above horizontal roof-to-wall intersections where a lower roof plane meets a vertical siding wall.
Early Warning Signs of Ground-Level Siding Decay
Catching moisture damage early prevents decay from migrating past the siding into the home's water-resistive barrier, oriented strand board (OSB) sheathing, and structural sill plate. A seasonal walk around the home's perimeter can reveal early warning signs.
Inspect the lowest two runs of siding for these physical and visual indicators:
- Paint failure: Blistering, flaking, peeling, or paint that wipes away as a chalky paste along the bottom lip of the board.
- Edge swelling: Thickened bottom edges or delamination, where engineered wood or fiber cement expands after absorbing water.
- Spongy texture: Wood or composite boards that give under light thumb pressure or feel soft when pressed with a flat screwdriver.
- Discoloration: Dark horizontal water-line staining, black mildew banding, or active green moss colonization along the lower edge.
- Fastener issues: Rusted nail heads, nails pulling through swollen boards, or loose corner trim boards.
- Insect activity: Subterranean termites or carpenter ants congregating near the foundation line, as damp structural framing provides ideal nesting conditions.
Practical Ways to Restore Proper Clearance Around Your Home
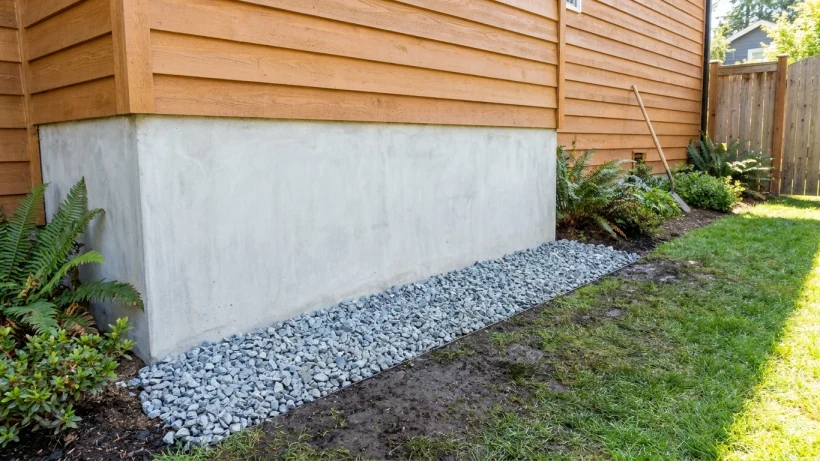
If an inspection reveals that your siding sits too close to the ground, several remedies can restore clearance. The right solution depends on whether the issue stems from accumulated landscaping or original installation errors.
Landscaping and Grading Corrections
In many homes, clearance was adequate when built, but years of adding fresh beauty bark, mulch, and topsoil raised the grade. Pulling back garden beds is often the least invasive fix:
- Excavate soil and mulch: Dig out beds alongside the foundation wall until at least 6 inches of concrete stem wall is exposed below the siding edge.
- Establish positive slope: Ensure the soil slopes gently away from the foundation at a rate of roughly 6 inches of drop over the first 10 feet.
- Install a gravel splash strip: Dig a shallow border trench (6 to 12 inches wide and 3 to 4 inches deep) directly below the wall, line it with permeable landscape fabric, and fill it with 3/4-inch washed drain rock. Gravel breaks the impact of falling water droplets, virtually eliminating mud splashback.
Carpentry Solutions
When concrete patios, walkways, or fixed topography prevent lowering the ground, the siding itself must be adjusted by a skilled carpenter:
- Cutting back bottom courses: Damaged lower boards can be carefully cut back using a track saw, re-establishing the required 2-inch or 6-inch clearance.
- End-sealing exposed cuts: Any cut edges on wood, composite, or fiber cement must be immediately sealed with factory-approved primer or paint to stop capillary wicking.
- Adding a water table trim assembly: In situations where siding is cut back significantly, carpenters often install a corrosion-resistant metal Z-flashing and a rot-proof cellular PVC water table board. This creates a clean architectural transition while placing an impervious material near the ground.
Long-Term Protection: Gutters, Drainage, and Seasonal Checks
Siding ground clearance works as part of an integrated moisture-management system. Even with proper clearance, concentrated water dumping from the roof can overwhelm lower wall assemblies during Pacific Northwest storms.
Keep these complementary exterior components in balance to protect your siding over the long term:
- Maintain clean gutters: Clogged gutters overflow, creating heavy curtains of water that fall directly onto foundation beds and cause extreme splashback.
- Extend downspout outlets: Direct downspout discharge through solid pipes or extensions at least 5 to 10 feet away from foundation walls to prevent water ponding.
- Prune perimeter shrubs: Keep shrubs, ferns, and ground covers pruned back at least 12 to 18 inches from the siding. This open buffer allows sunlight and ambient air to circulate freely along the foundation.
- Perform biannual clearance checks: Inspect your home's foundation line every spring and autumn, particularly after spreading new landscape mulch or completing outdoor renovation projects.